8 Exercises to Correct Rib Flare After Pregnancy
Mar 31, 2025Rib closure exercises after pregnancy can be the missing piece in your postpartum recovery journey. If you've noticed your rib cage hasn't quite returned to its pre-pregnancy state, you're not alone. Postpartum rib flare is a common issue that many new moms face, but the good news is that there are specific exercises that can help. What many women don't realize is that rib mobility serves as a crucial foundation for pelvic floor health—when your ribs can't move properly, your pelvic floor muscles can't function optimally either. This connection explains why addressing rib positioning can improve everything from core strength to pelvic floor symptoms. Keep reading for 8 simple exercises that will help you resolve rib flare and optimize your pelvic floor health.
Why Your Ribs Flare During Pregnancy (And Stay That Way After)
During pregnancy, your body undergoes remarkable changes to accommodate your growing baby. One significant change involves your rib cage expanding to make room for your internal organs as they get displaced upward. This creates what we call rib flare – where your lower ribs protrude outward rather than maintaining a more neutral position. Rib flare can also mean your entire rib cage getting wider. Check out this Instagram reel where I explain why your rib cage gets bigger from pregnancy.
This change happens because during pregnancy:
- Your diaphragm contracts and pushes down less effectively
- Your center of gravity shifts forward
- Your body adopts a more extended posture with an anterior pelvic tilt
- Your breathing patterns change to accommodate your growing baby
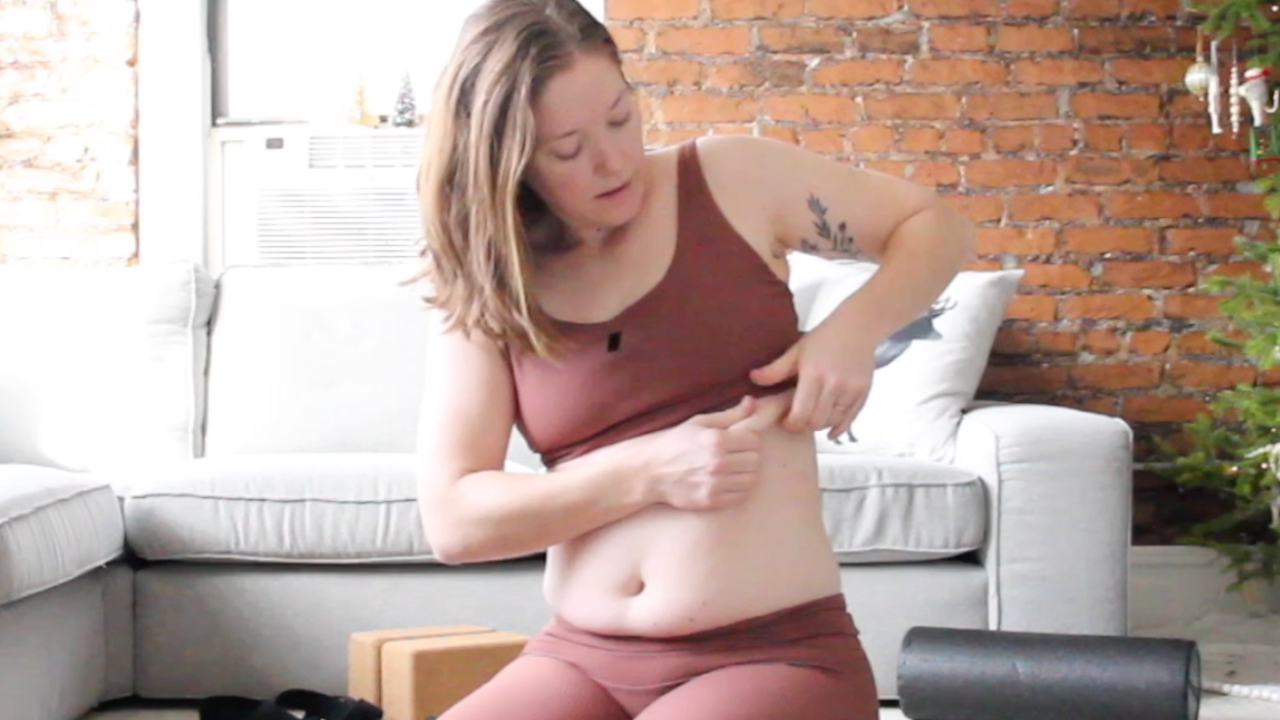
After giving birth, many women find their rib cage doesn't automatically return to its pre-pregnancy state. This lingering rib flare can contribute to several physical problems, including:
- Low back pain
- Pelvic floor dysfunction
- Difficulty engaging deep core muscles
- Altered breathing mechanics
- Thoracic spine issues
The infrasternal angle (ISA) – the angle formed by your lower ribs meeting at your sternum – often becomes wider after pregnancy. This wider ISA can affect your overall posture and contribute to pelvic floor issues long after delivery.
The Connection Between Your Ribs and Pelvic Floor
Your diaphragm and pelvic floor muscles work in tandem, like opposite ends of a cylinder. When your rib cage remains stuck in a state of inhalation (flared), your pelvic floor muscles can't function optimally. This can lead to:
- Urinary incontinence
- Pelvic organ prolapse
- Abdominal separation (diastasis recti) for an extended period of time
- Pelvic floor tightness or tension
Many physical therapists and postpartum trainers know that addressing rib angle is a crucial first step in resolving pelvic floor symptoms. And that's why working on rib cage mobility is central in the first week of Core Power.
8 Effective Rib Closure Exercises After Pregnancy
Let's explore eight exercises specifically designed to bring your ribs back to a more neutral position, improving both your posture and pelvic floor function.
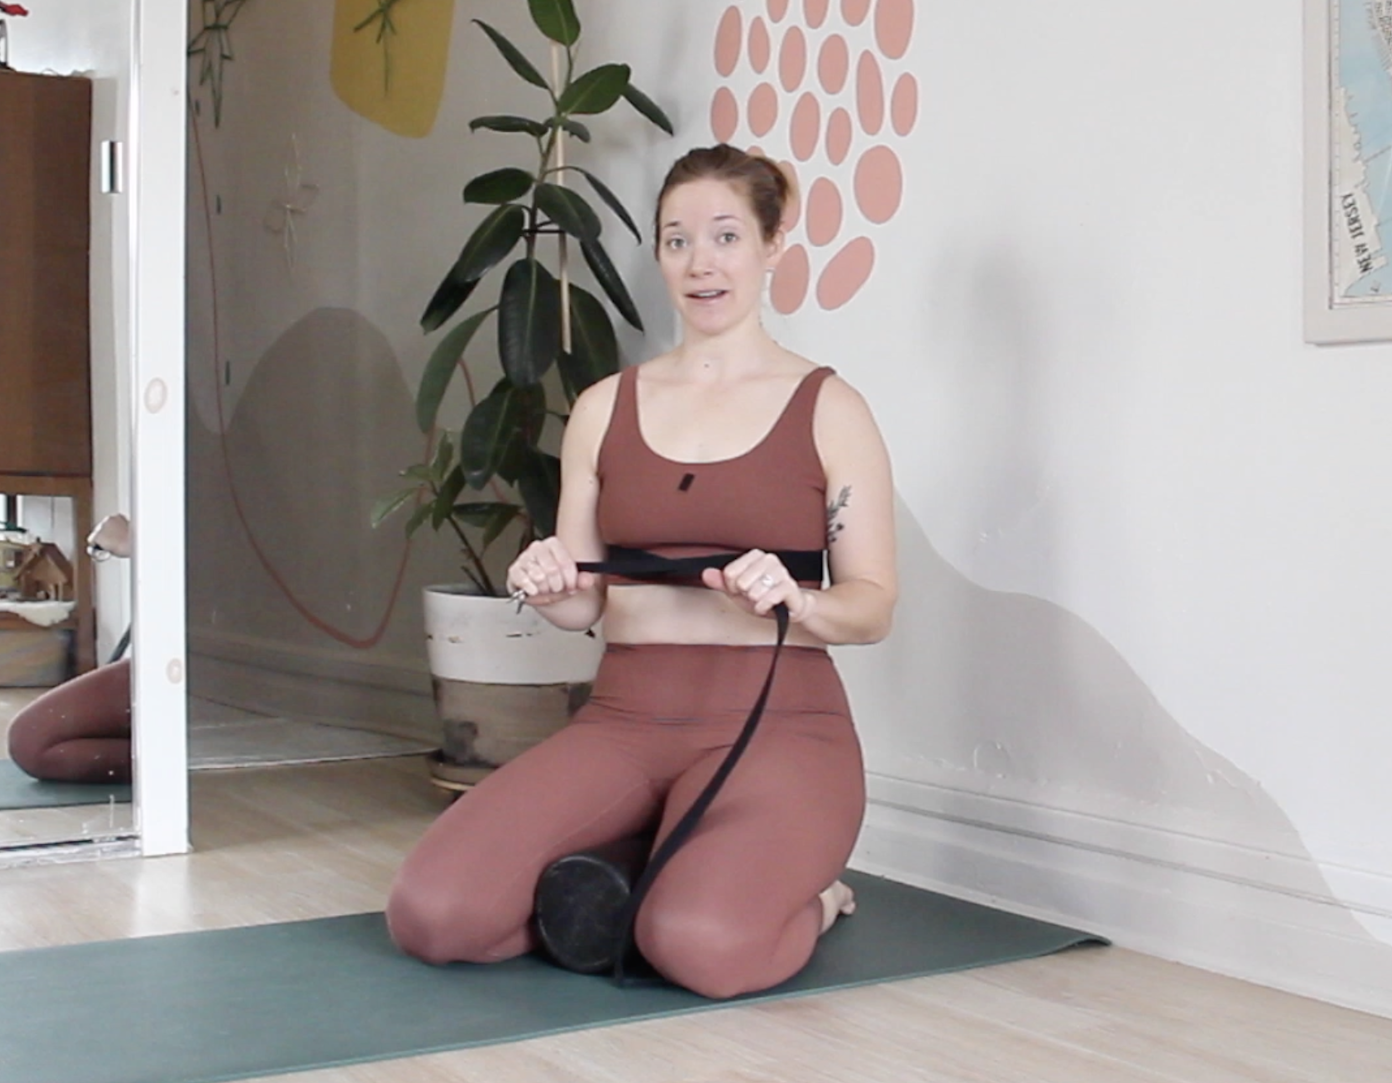
1. 360 Degree Rib Cage Breathing with a Strap
This foundational exercise helps restore your body's natural breathing mechanics while providing gentle feedback for your rib position.
How to do it:
- Wrap a yoga strap around your ribs, right about at your bra line
- Sit or stand with good posture
- Take a deep breath, feeling the strap expand in all directions (front, sides, and back), using the strap as resistance
- On the exhale, gently draw your ribs down and in
- Pay special attention to the end of your exhale, where you'll find the most rib closure
- Repeat for 5-10 breath cycles
Psst--this Instagram reel might be helpful in better understanding 360 degree rib cage breathing.
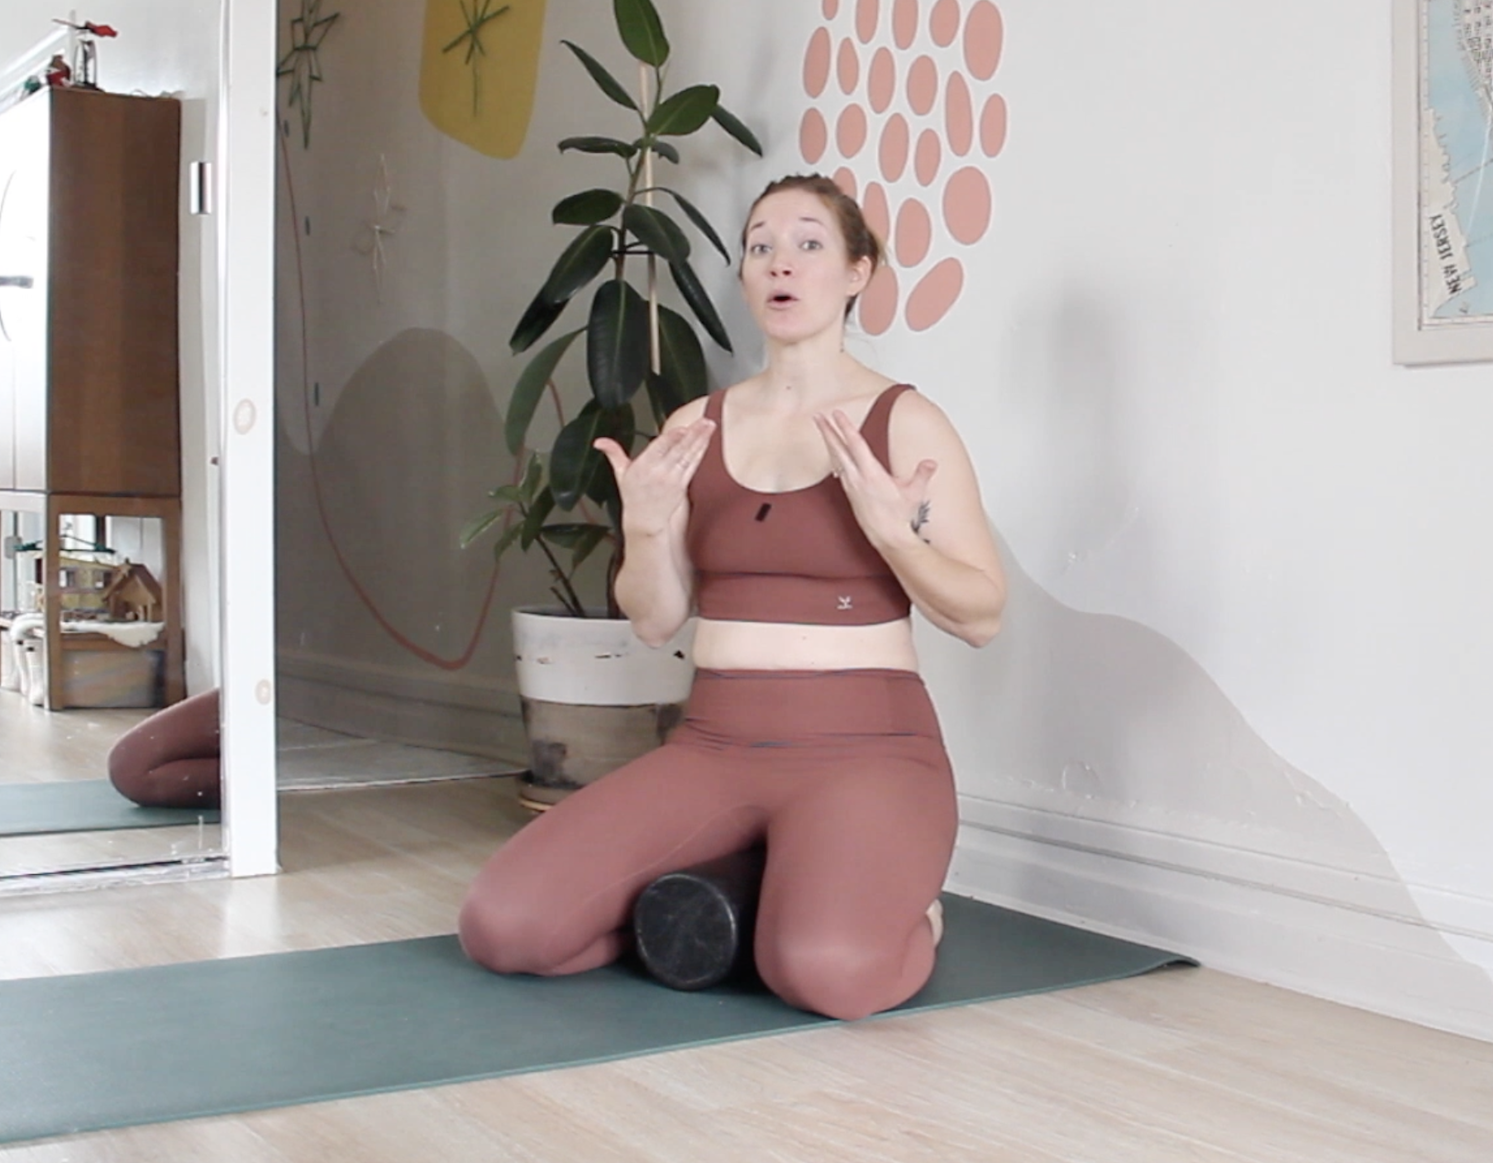
2. Pelvic Floor Breathing with a Roller
This exercise connects diaphragmatic breathing with proper pelvic floor engagement, addressing both top and bottom of your core canister.
How to do it:
- Sit down and straddle a foam roller.
- Use the strap from Exercise 1, or place your hands around your rib cage (thumbs on your back)
- On your inhale, feel your ribs expand while your pelvic floor relaxes
- On your exhale, gently draw your ribs down while lifting your pelvic floor muscles
- Focus on the coordination between your rib movement and pelvic floor activation
- Repeat for 8-10 breath cycles
I took this exercise straight from my FREE Pelvic Floor Fundamentals 8-minute core + pelvic floor workout--check it out here.

3. Skin Rolling for Fascia Release
Skin rolling helps release fascial restrictions that may be keeping your ribs flared or contributing to abdominal separation.
How to do it:
- Using your thumbs and fingers, gently pinch and lift the skin around your rib cage
- Roll the skin back and forth, moving gradually across your upper abdomen
- Pay extra attention to any tight or uncomfortable areas
- Spend about 2-3 minutes total
- Notice areas of tightness, especially on your right side or left side where rib flare might be more pronounced
We do this twice per week as part of our pelvic floor release sessions inside Core Power!
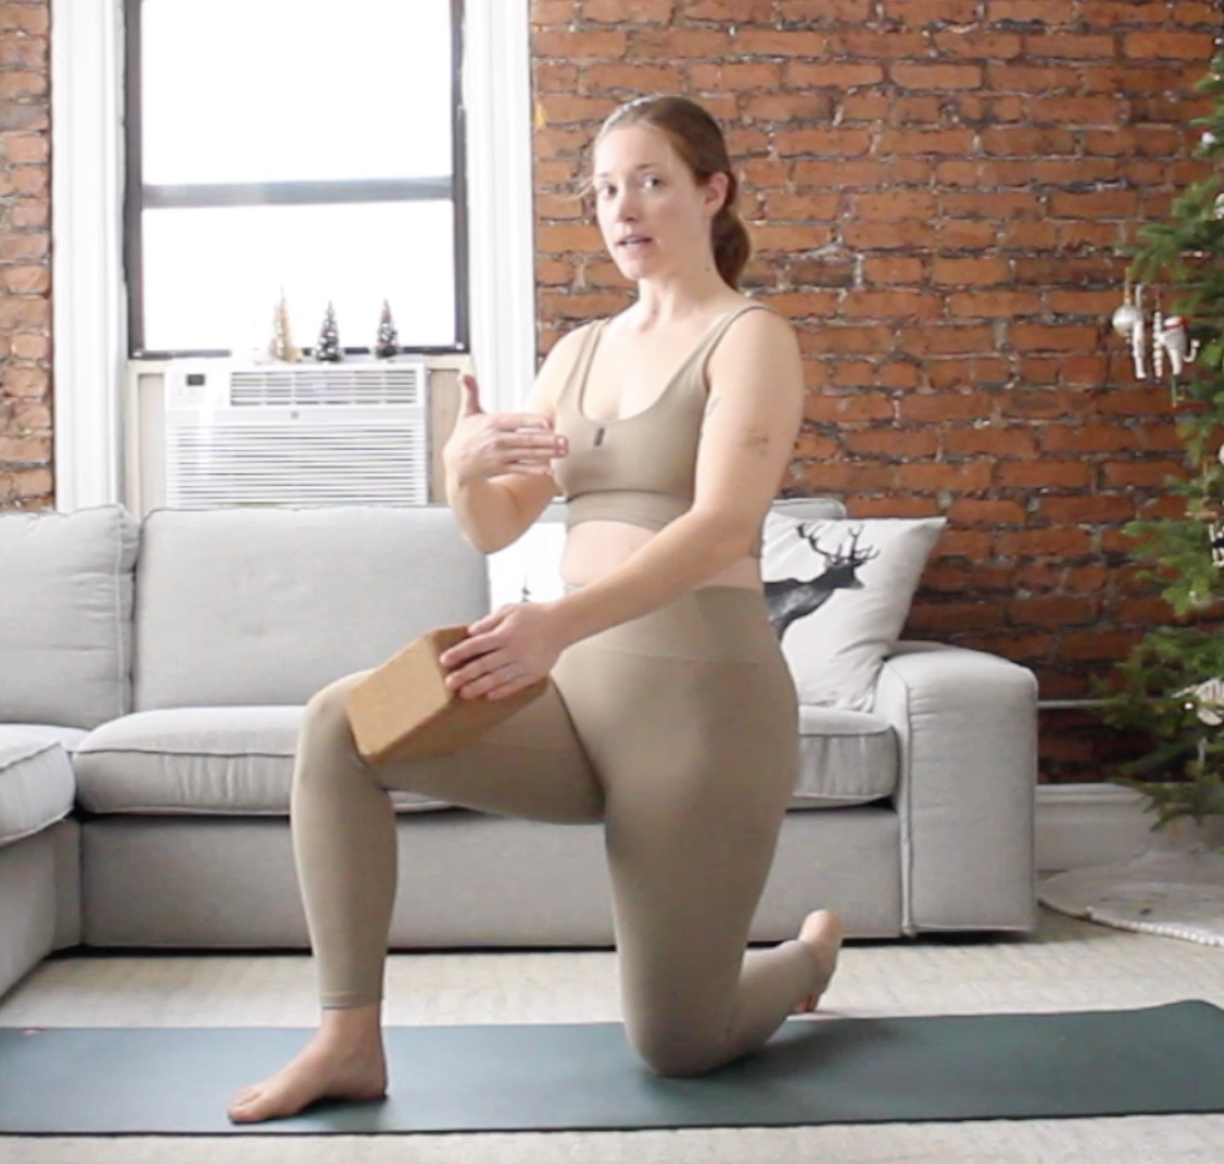
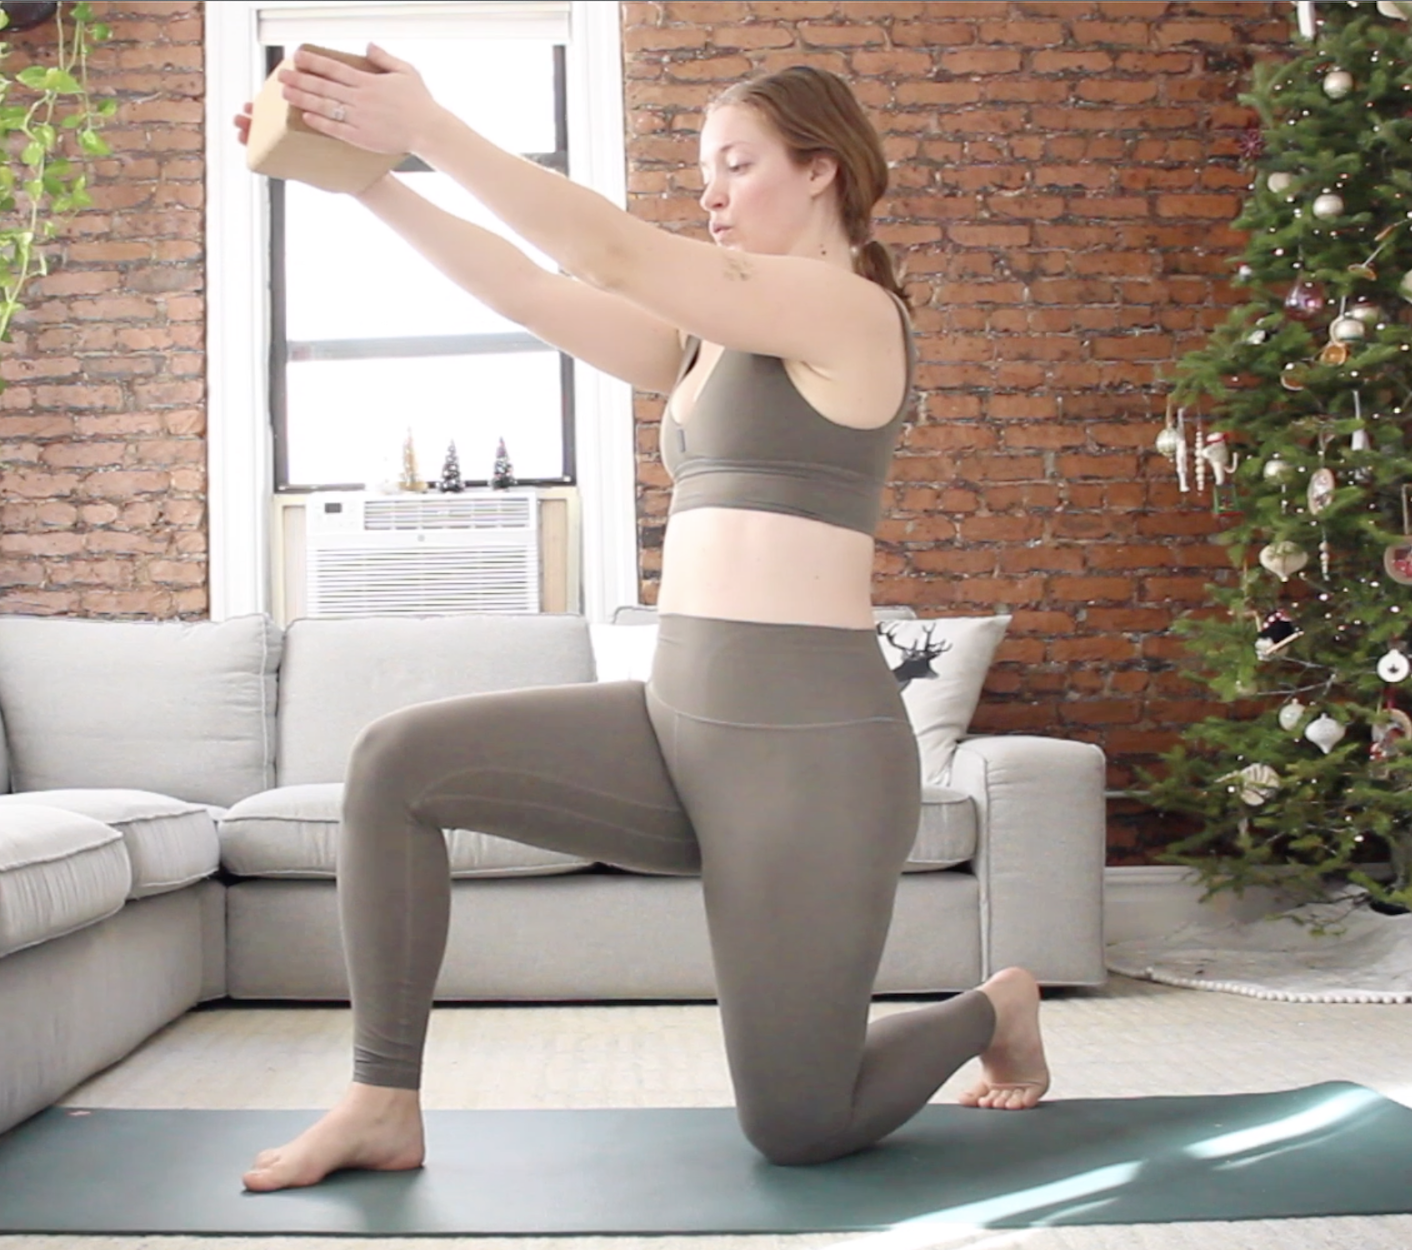
4. 90/90 Diagonal Activation with Block
This exercise helps reestablish the connection between your deep core muscles and back muscles while stabilizing your rib cage.
How to do it:
- Kneel with one knee down, one foot down in a 90/90 position.
- Position a yoga block into the side of your knee with the opposite hand.
- Inhale deeply to relax your pelvic floor and expand your rib cage.
- Exhale fully, drawing your ribs down toward your belly button as you press the block into the side of your knee.
- Repeat 5 times
I took this exercise straight from Level 2 of my comprehensive core + pelvic floor workout program--check out Core Power here.
5. 90/90 Rotational Activation with Block
Adding rotation helps integrate your core in multiple planes of movement, addressing rib flare from different angles.
How to do it:
- Start in the same 90/90 position as the previous exercise
- Hold a yoga block in between your hands, without letting your fingers grip around the edges.
- Keeping your arms straight, position the block down in front of your thigh (of the kneeling leg) as you inhale deeply.
- Exhale fully as you squeeze the block and push it up at a diagonal to end above your lifted knee.
- Perform 5 rotations per side, moving with your breath
I took this exercise straight from Level 3 of my comprehensive core + pelvic floor workout program--check out Core Power here.
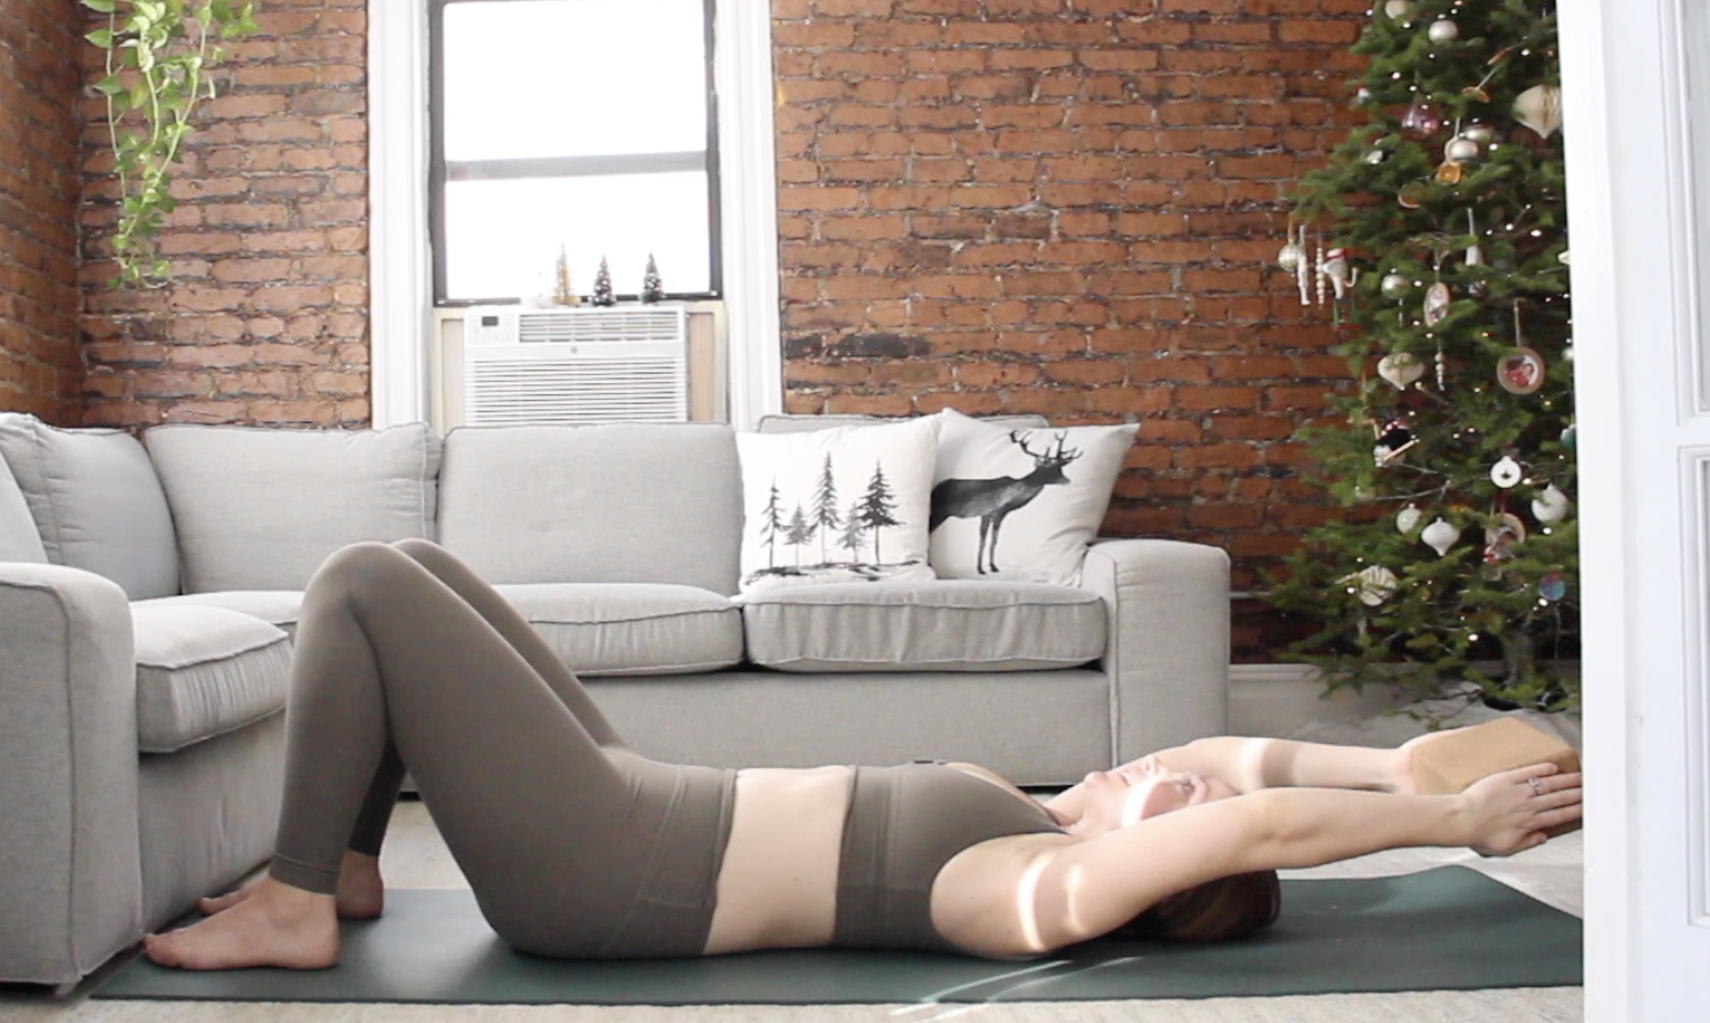
6. Supine Block Overhead Extension
This exercise addresses the thoracic spine mobility needed for proper rib positioning.
How to do it:
- Lie on your back with knees bent, feet flat on the floor
- Hold a yoga block with both hands
- Slowly extend your arms overhead, keeping your ribs drawn down
- Take a full inhale and exhale in this position, making sure to keep the ribs drawn down.
- Inhale slowly as you bring the block up over your chest.
- Exhale forcefully as you extend the block overhead again.
- Repeat 8 times
I took this exercise straight from Level 3 of my comprehensive core + pelvic floor workout program--check out Core Power here.
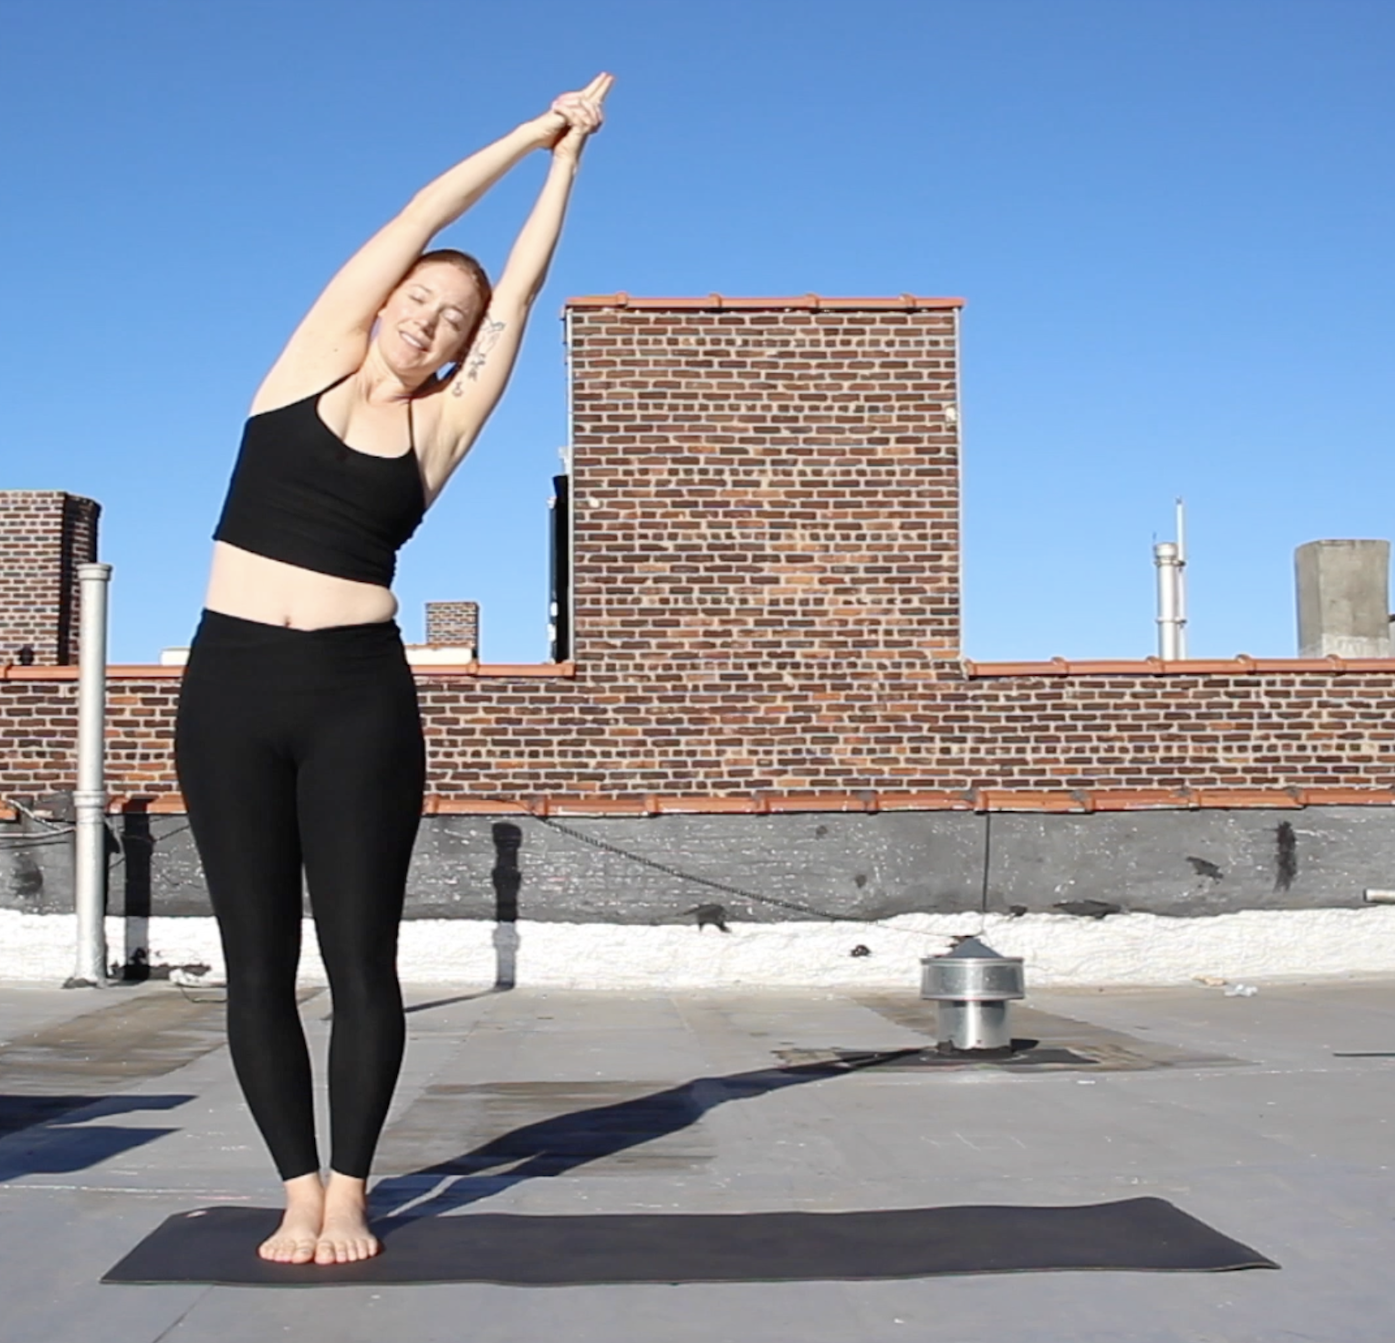
7. Crescent Moon Pose for Side Body Integration
This gentle yoga pose helps create length and space in the side body while promoting proper rib positioning.
How to do it:
- Stand with feet hip-width apart
- Inhale your arms up overhead, clasping fingers but releasing the index fingers (think Charlie's Angels hands)
- Exhale fully, drawing your ribs down as you bend to one side
- Focus on lengthening rather than collapsing into the side bend
- Hold for 3-5 breaths, then repeat on the other side
- Notice if one side feels tighter or if your degree of rib flare differs side to side
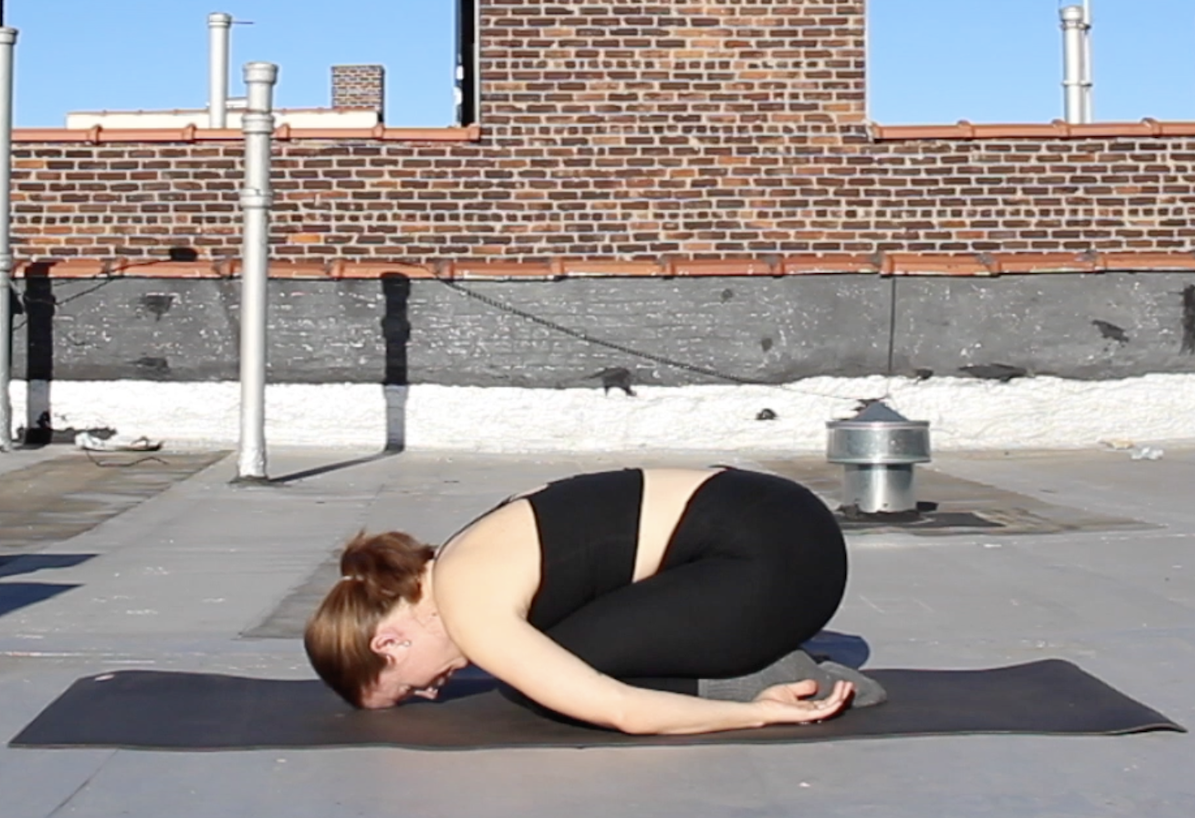
8. Embryo Pose for Back Rib Expansion
This gentle, restorative pose helps balance rib positioning by compressing the front side body while creating space for the back ribs to expand, addressing the common forward-flaring pattern.
How to do it:
- Begin seated on your heels in a kneeling position
- Slowly round forward, bringing your forehead toward the floor
- Drape your arms back, next to your shins, with the palms facing up
- Allow your chest to soften toward your thighs, creating a gentle compression in your front body
- As you inhale, direct your breath into your back ribs, feeling them expand
- On your exhale, maintain the space you've created in your back body while gently drawing your lower front ribs in
- Hold for 5-8 breaths, focusing on this balanced breathing pattern
This position naturally counteracts the forward rib flare by teaching your body to expand in the areas that are often restricted while containing areas that tend to over-expand.
Be Patient With Your Postpartum Recovery
Remember that resolving postpartum rib flare takes time and consistency. Your body spent nine months adapting to pregnancy, so be patient as you work on these rib closure exercises after pregnancy. The degree of rib flare and healing timeline varies widely among women.
For best results, practice these exercises 3-4 times per week, focusing on quality over quantity. Pay attention to your breathing patterns throughout the day, and try to catch yourself when you're in an extended posture with ribs flared.
If you're experiencing significant pelvic floor symptoms alongside your rib flare, consider working with a pelvic floor physical therapist who can provide personalized guidance.
Ready to take your postpartum recovery to the next level? Core Power provides a comprehensive approach to rebuilding your core and pelvic floor strength, addressing not just symptoms but the root causes of postpartum physical challenges.
What rib closure exercises have worked best for you? Let me know in the comments!
get more like this
straight to your inbox, every Monday morning!
